Icon fonts have been with us for a few years. In the past, I've had no qualms about using a version from a CDN, even though they included way more than I needed.
Earlier today, I swapped out Font Awesome for ionicons. The standard Font Awesome font file comes in at around 50kb while the default ionicons font weighs in at around 100kb. I'd blindly accepted the extra bytes with Font Awesome but seeing the increase resulting from switching to ionicons bugged me. I figured today was as good a time as any to see what's involved in a custom build.
The ionicons repo includes build instructions so that's where I started. Once I had everything locally, I made a list of the icons I needed. Here it is:
- chevron-right
- help-circled
- ios-list
- ios-loop-strong
- ios-pint
- navicon-round
- navigate
- search
This short list should also drive home why it bothered me to download 100kb: I only needed eight icons.
Next up was to put the .svg files for those icons in a new copy of the src folder and edit manifest.json to only include those icons. The latter is a good text manipulation practice (with vim, of course). With those two pieces in place, it was time to do the build. In a terminal window, python ./builder/generate.py from the ionicons directory gets the job done.
The build itself is quick and the new assets are in the css and font directories. I copied the new ionicons.min.css file and font folder into my project, updated my markup, pushed everything up to my server and was good to go.
Screenshot of the difference via Chrome Dev Tools's Network tab: 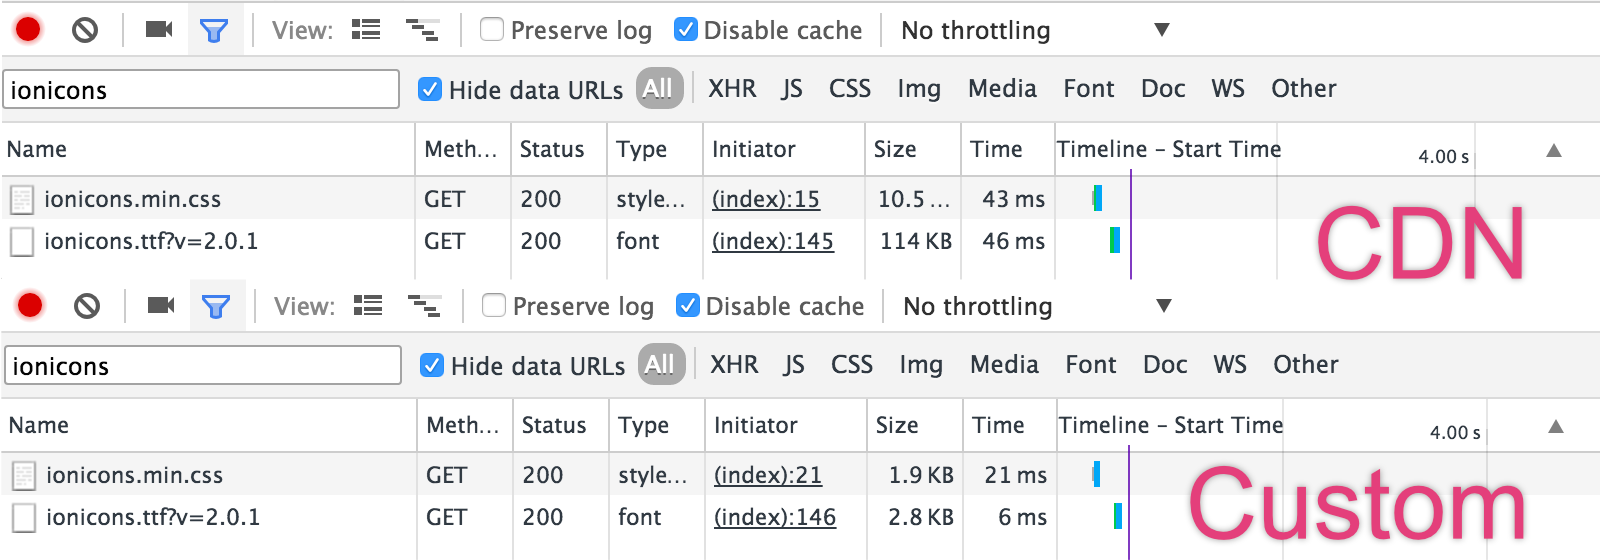
The project in question using this stuff is my San Diego Brewery map.
Update 10/25/2015: Added a link to my custom manifest.json as a gist.